Wednesday, April 22, 2020

Addicted To Stamps And More Challenge #386...

Hi! The new challenge is up at the Addicted To Stamps And More Challenge blog. The theme this week is the most popular and the easiest.


My inspiration today is a bit different. If you follow my blog or my Instagram/Facebook page, you must have seen the different home decor projects I have been sharing. Some time back I tried my hand at stamping on wood. And it worked out beautifully! You can find those posts here, here and here.

Today I have a set of coasters for you, using stamping as well as some mixed media supplies.


I prepped the coasters by applying two coats of chalk paint. Once the paint was dry, I stamped the flowers and leaves from the Peony Bouquet, Beautiful Day and Japanese Mum stamp sets with Versafine Black ink. I used the Altenew Crisp dye inks for the colored layers.

I allowed the inks to dry completely and used the 2 Step Crackle Medium by Little Birdie on top of the coaster. Once both the coats were dry, I rubbed some Little Birdie Metallic Wax in rich gold to bring out the cracks. Here are some close-ups and individual pics of the coasters.

Japanese Mum stamp set with Red Sunset mini ink cube set.


You can see the lovely crackle effect over the stamping. 


The Beautiful Day stamp set and Pocketful of Sunshine mini ink cube set.


The subtle shading of the flowers is seen even through the crackle medium.


I used only the leaf from the Beautiful Day stamp set and a mix of green mini ink cubes.


Peony Bouquet stamp set and Cool Summer Night mini ink cube set.


I hope you are inspired by my project to create something beautiful. Please do go to the Addicted To Stamps And More Challenge blog for lots of amazing inspiration. You can also link your creations there. 

Entering this card in the following challenges:


Simon Says Wednesday Challenge - Knock On Wood:


Love,
Nandini

Thursday, April 16, 2020

Home Decor with Altenew Supplies...

Hi! I am back today with another set of tray and coasters with my Altenew supplies. I used a pinewood base for my tray and the coasters are made of laser-cut MDF. I have already shared a detailed post on the whole process here. If you have any more questions please feel free to ask. 

This whole thing was very much an experiment for me. So I learned as I went along. And I am happy with the results.


I took a tray base and stamped the images from the Beautiful Day, Peony Bouquet and Japanese Mum stamp sets with Versafine Black ink. After that dried, I stamped the colored layers with Altenew Crisp dye inks. Here is a look at the process.


After the stamping was done, I inked the sides with brown ink. Here is the completed panel.


A closeup of the stamping.


And the finished tray.


For the coasters, I painted the oval coasters with two layers of chalk paint. I stamped the outlines with Versafine black ink. After the ink was completely dry, I masked the images with two layers of masking fluid.


I inked the coasters with distress oxide inks. Once dry, I removed the masking and stamped the colors with Altenew Crisp dye inks. 

I used different sets of mini ink cubes for the flowers.


The coasters above and below were both stamped with Red Cosmos mini dye ink set.


Pocketful of Sunshine and Golden sunset.


Cool Summer Night.


Here are all the completed coasters.


And another look at the tray and coasters.


I hoped my project has given you more ideas on how to stretch your Altenew supplies and use them for mediums other than paper. Looking forward to hearing from you.

I am entering this project in the following challenges.

Simon Says Wednesday Challenge - Knock On Wood:


Love,
Nandini

Friday, April 10, 2020

Stamped Tray & Coasters with Altenew Stamps & Inks...

Hi! I am here today with a very different project. I had originally made these articles for the Altenew Educator blog hop in March. But the finishing work took longer than I expected and I ended up doing some fabric projects instead. Which was a good thing since I discovered a whole new application for my Altenew supplies. You can find all the details of that here.

Coming back to the project today, I tried stamping on wood for the first time for my final project for the AECP Level 2. The brief was to create a home decor project. You can find all the details of that project here. This time too I made a tray and a set of coasters. Here is my project.


I started with a piece of wood covered with veneer. I cut out a paper of the same size and first planned out my design.


This step is vital as stamping on veneer is tougher than paper. Once the stamp touches the veneer, there is no way of rectifying any mistakes. Also, we cannot use a stamp positioner. Or restamp the images easily. Having a clear design in mind is very helpful in getting a good design. I used Japanese Mum, Peony Bouquet and Beautiful Day stamp sets for the cluster. 


Here is a close-up of the stamped bouquet.


Once the outlines were stamped, I went back with the Altenew Crisp dye inks and stamped rest of the layers. Here is a look at the flowers with the stamped layers.


You can see the different mini cube ink sets I used. One thing to remember is, use the darker shades since the lighter shades don't show up well on the textured background.

Once the stamping was done, I masked the entire thing with masking paper and added brown ink with a brush. 


For the smaller leaves, I diluted green and yellow inks and colored with a small brush. Here is a close-up of the completeed panel.


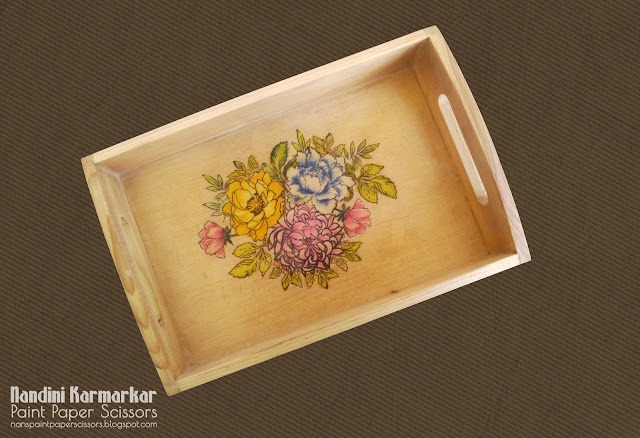
And the tray, after the framing and finishing.


The coasters were much easier to make since I used MDF which has a smooth surface. I covered each coaster with cream chalk paint and stamped a single flower on three. On the fourth, I stamped the bud and the leaves from the Peony Bouquet stamp set. I used only the outline stamps at this stage. Once the black ink was dry, I covered the stamped area with two layers of liquid masking fluid and allowed it to dry completely.


I used distress oxide inks with a brush to one side for inking on each coaster. After allowing the ink to dry, I removed the masking fluid and stamped the layers of each flower. Here is a look at the coasters.


I used a different set of mini ink cubes for each coaster. Here are the individual pics.

Rose Petal


Glacier Caves


Red Sunset


Pocketful of Sunshine, Warm & Cozy and Red Cosmos.


The varnish that was used to finish the tray and coasters and make the articles water proof did lighten the colors a lot. But my fear that the colors would run as they are water soluble didnot come true. 

Here is another look at the tray and the coasters.


I hope you liked my experiments with my Altenew supplies and will give these a try. I am so happy that this worked as it opens up a whole new medium and range of products to stamp on and beautify. Please do let me know what you think of these articles as well as any suggestions for improvement.

Looking forward to hearing from you.

Entering these in the following challenges.


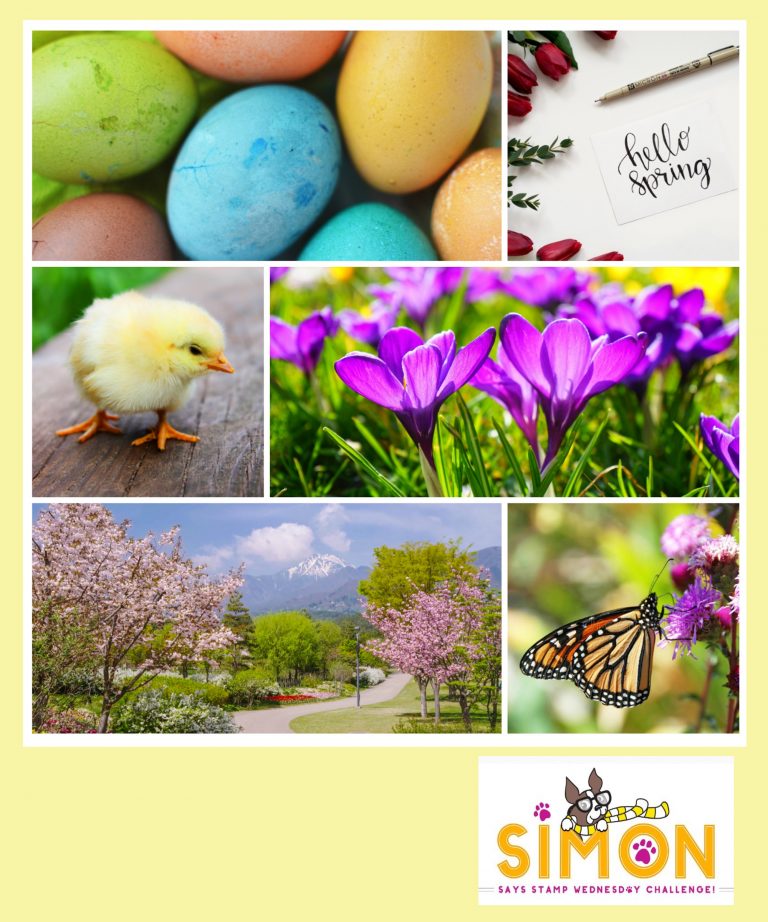
Simon Says Wednesday Challenge - Spring Moodboard:


Stinkin' Inkers Challenge Blog - Crafter's Choice:


Love,
Nandini.

Thursday, April 9, 2020

Happy Little Stampers April Challenge...


Hi! The current challenge at Happy Little Stampers Anything Goes with Dies is up. We have a new challenge each month. You can link any projects that include a die-cut. I have a scrapbook layout for you today.


The photos feature my daughter and her best friend. They were at an inter-school competition when these pics were snapped. To start, I edited the photos and got them printed at my stationery store. The background is based on an art journal page by Shari Carroll for Simon Says Stamp. You can check out her detailed video here

I started with a piece of thick watercolor paper. I used a mix of chalk paints and pouring paints by Little Birdie to create the paint streaks and added some paint splatters with black and gold paint. While the paint was drying, I trimmed the photos into squares and rounded the corners. I also added white and black mats.


The mandala die-cuts were made using the Floral Doily die by Dress My Craft, an Indian brand. I was very impressed by the quality of the die. It cut through the paper like butter in the first pass! 


The sentiment is from the Critter Party stamp set by Mudra Craft Stamps. I die cut the letters BFF out of gold glitter foam and black paper and layered both on a panel of ivory paper.


I put all the layers together and added some gold sequins as a finishing touch. Finally, I rounded the corners and adhered the panel to a larger piece of black paper.


I hope my layout inspires you to create something beautiful. You can visit the  Happy Little Stampers challenge blog for more inspiration and link your creations. I look forward to visiting you in our gallery.

Love,
Nandini

Triangle Corner Pop-up Card...

Hi! I am here today with a rather unusual card. When I saw this card in my Pinterest feed, I was intrigued. I found an excellent tutorial by Vicki of Stamped Smiles that helped me put this card together very quickly. The card folds flat, though it is rather bulky due to all the layers.


When assembled, it is a beautiful 3-dimensional card with a small easel element included.


I used ivory card stock, purple paper and the Floral Corsage paper pack by Craft Gully. The stamps are from Craftyscrappers and Mudra Craft Stamps. I used the Chloe Stem die by Memory Box and the Fancy Butterfly die by Impression Obsession. Here is a closer look at the easel element.


I stamped a birthday message with purple ink.


Some half pearls from my stash were the final touch.


It opens up like this.


The blank panel at the bottom left gives ample space for writing a personal message. 

I am very happy with the way this card turned out. It definitely has the surprise factor. It will also be fun to play with interactive elements.

I am entering this card in the following challenges.

Simon Says Wednesday Challenge - Spring Moodboard:


Watercooler Wednesday WWC266:


Stinkin' Inkers Challenge Blog - Crafter's Choice:


Edited – 10-06-2021

Creative Creases Challenge #8


Love,
Nandini