Wednesday, August 28, 2019

Challenge Entries...

Hi! I recently made a card set using Altenew supplies as a birthday gift for a friend. This is also my inspiration for the current Addicted to Stamps and More challenge where the theme is Anything Goes.  


You can find the details on how I made the cards and the box here. I am entering these in the following challenges.

International Art & Soul Challenge #65 - Flowers:

Simon Says Stamp Wednesday Challenge - Clean & Simple:

Simon Says Stamp Monday Challenge - 'S' is for:
S is for stamping.

Just Us Girls #502:
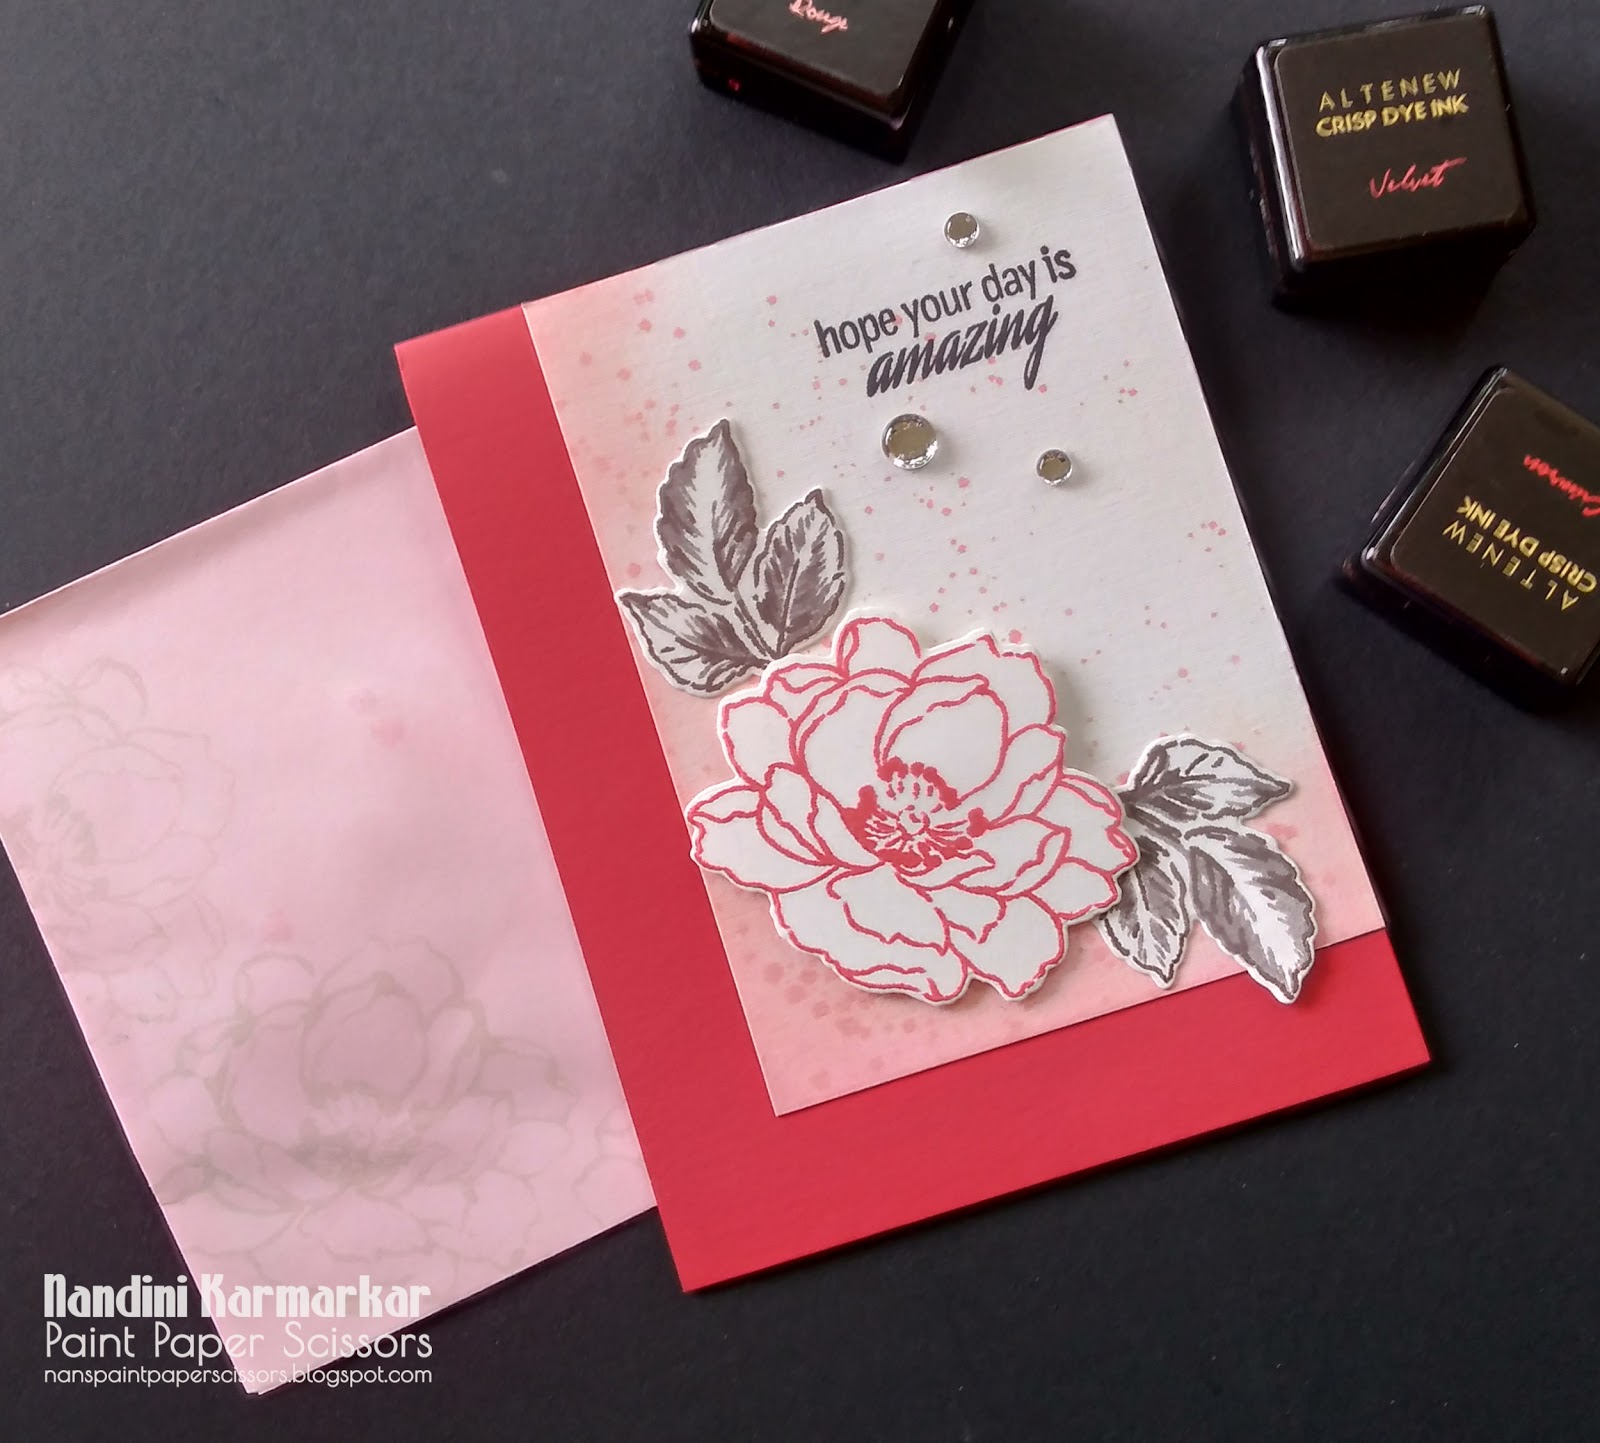
I have used most of the colors in my card set.


This is my favorite card from the set.


Entering this card in the following challenges:


I used the left column - Stamp, Distressing, Flowers

STAMP(DIGI OR RUBBER)
EMBOSSING
DIE CUTS/PUNCHES
DISTRESSING
SENTIMENT
SHAPED CARD
FLOWERS
METAL EMBELLISHMENT
RIBBON/TWINE

Love the soft colors on this card. It reminds me of cotton candy.


Entering this card in the following challenge:


Love,
Nandini

Addicted To Stamps And More Challenge #356...

Hi! I am here today with some fresh inspiration for this week’s challenge at the Addicted to Stamps & More challenge blog. The theme this week is our most popular one.


I created a card set using some Altenew supplies for a dear friend. I also made a box to hold the cards and envelopes and decorated it using the same stamps. Here is the box.


I made the box with black card stock. I created the top by stamping the outline flowers from the Beautiful Day stamp set by Altenew on a cream panel with red and teal inks. The sentiment is from the Birthday stamp set by Ranger. I stamped it with Versafine Onyx Black ink.

A look inside the box.


For all the cards I used the Beautiful Day stamp set and mini ink pad sets by Altenew. 

For the first card, I used the Warm and Cozy mini cube set. 


I stamped only the outline of the flower, using the darkest shade in the set and die cut it using the coordinating dies. The leaves were stamped with three shades of the Warm Grey set and also cut using the dies. I trimmed a panel of white card stock and inked a corner with the same ink I had used for stamping. I also added some ink splatters for added texture.


I adhered the inked panel to a coordinating card base and arranged the flower and leaves over it. The sentiments are all different, from Fresh Freesia, Beautiful Day and Floral Art stamp sets. I stamped each with Versafine Onyx Black ink. 

To finish, I added some clear gems from my stash. I also stamped the flowers with light grey ink on all the envelopes. Here is the completed card and envelope.


Here are the rest of the cards with the ink sets I used.

Sea Shore mini ink cube set


Tropical Forest mini cube set


Red Cosmos mini cube set


Glacier Caves mini ink cube set


Red Sunset mini ink cube set


Here is the whole card set along with the box.


I hope you liked this card and are inspired to create something beautiful. I look forward to seeing your creations in our gallery. Please visit the Addicted to Stamps and More blog to link your creations and also get more inspiration from my talented teamies.

Love,
Nandini

Wednesday, August 14, 2019

Addicted To Stamps And More Challenge #354...

Hi! Wednesday means a fresh new challenge at the Addicted To Stamps And More Challenge. This week’s theme is very dear to me.


I have always loved the Build-A-Flower series by Altenew. This series features a different flower every month and the sets have both stamps and the coordinating dies, which is great. I decided to go for the Japanese Mums as my first set. Here is the first card I made with this gorgeous stamp set.


I started with a top folding card base in cream. This paper has a fine splattering of dark colors which gives it more texture. I stamped the outline of the Japanese Mum stamp set by Altenew with Versamark ink all over the front and heat embossed it with Ranger’s Metallic Copper embossing powder. After heat embossing, I stamped the final, detailed layer with Versamark and heat embossed with the same embossing powder. Here is a look at the embossing.


Since the background was quite busy, I decided to keep the rest of the card very simple. I stamped the sentiment from the Birthday Greetings stamp set by Altenew on a strip of the cream paper with dark brown ink. For the mat, I simply inked another piece of with the same ink. I adhered the mat to the card base and added the sentiment panel popped up on some foam tape. To finish, I added two pearls from my stash.


Here is another look at the completed card.

I hope you liked this card and are inspired to create something beautiful. I look forward to seeing your creations in our gallery. Please visit the Addicted To Stamps And More Challenge to link your creations and also get more inspiration from my talented teamies.

Entering this card in the following challenges:
International Art & Soul Challenge #64 - Embossing:

Crafting Happiness #9 - Flowers:

Scrap From Your Heart Challenge #36 - Monochromatic:

Pearly Sparkles Challenge #43 - Something Beginning with B:

CCEE Stampers CCEE1932 - Embossing:

Love,
Nandini

Tuesday, August 13, 2019

One Layer Card...

Hi! I was very happy to receive my parcel from Altenew recently. It took more than a month to reach. But I am happy to finally have it because it brought me my very first Build-A-Flower set and the gorgeous Beautiful Day set. These have been on my wishlist for ages. I couldn't resist playing with them immediately.

One layer cards are always very challenging. I decided to try my hand at making one, using a technique that Yana Smakula recently demonstrated. You can find the original card and the video here. And here is my card.


I started with a cream card base. I love this paper as it has tiny flecks of dark colors. I masked off the edges with washi tape and then stamped my flowers with the inks from the Altenew Coffee Break mini ink pad set. Since I used the stamp positioner, I was able to get two identical flowers by simply rotating the card base. I used the largest bloom from the Beautiful Day stamp set by Altenew and used all the layers except the base layer. The sentiment is also from the same set and I stamped it with Versafine Onyx Black ink. Here is a closer look at the flower.


I stamped some of the smaller images around the flowers as well. After the stamping was done, I used the Sand Dunes ink and blended it around the edges with a makeup brush. I allowed the ink to dry a bit and then carefully peeled the washi tape away.

Here is another look at the completed card.


I really love this look. Entering this card in the following challenges:

ModSquad Challenge - Layer Me Not:
This was the challenge that inspired me to try this technique.

The Flower Challenge #35:


Designer’s Choice Challenges A719 - Try A New Technique:


Love,
Nandini

Friday, August 9, 2019

Happy Little Stampers August Challenge...

Hi! The month of August, so far, has been stormy, literally! I have never seen so much rain in so short a period! The whole of western India seems to be drowning. Hopefully, things will get back to normal in very soon.


Moving on, it is time for the August Happy Little Stampers Anything Goes with Dies challenge.


I have a quick and simple card for this month's challenge.


I started with a white card base that I inked with some green distress oxide inks. I die cut the frame from two green papers and layered them on top. The sentiment is from Technique Tuesday, stamped with Versafine Onyx ink. Here is a closer look at the card.


Hope you liked my card and found it inspiring. Do check out the Happy Little Stampers Anything Goes with Dies challenge for more inspiration from the DT and details on linking your creations.
Love,
Nandini


Thursday, August 1, 2019

Rainbow Card Challenge - Passion For Purple...

Hi! I am back with another great challenge for the Rainbow Card Challenge. Here is the inspiration pic.


I just love all the gorgeous shades of purple here. My favorite is the bottom right pic with the black and purple combo. Here is the card I created for you.


I decided to do some ink smooshing with distress and distress oxide inks. I used my Waffle Flower Water Media mat as my work surface. I was one of the lucky people to win it when it was released. It is an amazing product, very well designed and useful. I added the inks directly to the work surface and sprayed with water. After pressing the paper into the inks, I dried it with my heat tool.  Since the water media mat is made of heat resistant silicone there was no need to keep moving the paper around. And cleaning up the inks between layers was super easy! Here is the piece I created along with the inks I used.


I added several layers until I was happy with the look. 


I dried the panel thoroughly and trimmed it to fit an A2 size card base. 

I die-cut some wreaths from black card stock and glued them to the smooshed panel which was glued to the black card base. 

The sentiment is from the Wishing You stamp set by Mudra Craft Stamps. I stamped it with Versafine Onyx Black ink on a scrap of paper left over after I trimmed the smooshed panel. I matted it with black and added it to the card after popping it on some foam tape.

To finish, I die-cut a few tiny flowers from black cardstock and glued them to the wreath.


Here is another look at the completed card.


I hope you liked my card and are inspired to create something beautiful You can visit the Rainbow Card Challenge blog for more inspiration from the design team and link your entries. 

Love, 
Nandini


Papercraft Challenge #21...

Hi! I am so thrilled to a part of the design team at the Papercraft Challenge blog. We have fun challenges every month with different themes. Papercraft Business also has tools that can help you take your papercraft business to the next level. Do check out the awesome Papercraft Business Planner that helps you keep track of your challenges.

The theme this month is - Circles. From the shape of the card to the elements in your card, there are countless ways of incorporating this! I decided to go for simple repeat stamping using two small stamps and created my own background.

  • Take the outline circle from Altenew’s Simple Shapes stamp set. Place it over the card base on the stamp positioner and stamp with Versafine Onyx Black ink. Move the card base by 1 inch and stamp again. Repeat with the oval stamp from the same set.
  • Once the first row is complete, reposition the stamps and repeat until the entire background is covered. I always do the first run on a piece of scrap paper cut to the size of an A2 card base. This helps in avoiding mistakes while repositioning the stamp.
  • Dry the background to avoid smudging. You can also heat emboss with clear ink if you wish. Colour with Zig Clean Color markers.

  • Trim a piece of vellum slightly smaller than the stamped panel and adhere it to the back. This immediately softens the look of the bright coloring and highlights the sentiment panel.
  • The sentiment is from the Birthday Greetings stamp set by Altenew. Stamp it with Versamark ink on a black paper and heat emboss with metallic gold embossing powder.
  • To assemble the card, adhere the stamped panel with vellum to a top folding kraft card base over a black mat.
  • Add the sentiment strip to the card, popped up on some foam tape.
Here is another look at the completed card.


I hope my card inspires you to create something beautiful. Do remember to check out the Papercraft Challenge blog for inspiration from the design team. My talented teammates have really outdone themselves this time! 

The winning prize: Whimsy Stamps – Wee Florist
Wee Florist Stamp
You can get more information about Papercraft Challenge Planner here. It is an invaluable tool for all crafters who love taking part in challenges. The Papercraft Business site also has tools that can help you take your papercraft business to the next level. 

Looking forward to hearing from you.

Love,
Nandini