Wednesday, October 31, 2018

Addicted To Stamps And More #316...

Hi! This week is one of my favourite themes at the Addicted To Stamps And More challenge blog:


I recently bought the Wreath Turnabout stamp set by Concord & 9th. I decided to use it to create two similar cards with two different colour schemes.


This is a super simple stamp set to use. Once you do the basic steps needed to align the stamp, working with it is a breeze! Here is a closer look at the cards.


I used the inks from the Rose Petal mini ink cubes by Altenew for this card. 


I used the inks from the Sea Shore mini ink cubes by Altenew for this card. 

Once the stamping was done, I die cut the sentiment from the stamped panel with the Spellbinders Just For You set. I adhered some coordinating cardstock behind the sentiment and then popped it up on some foam tape. 

Entering this card in the following challenges:

Less Is More Challenge #383 - Dimension:

Cardz For Guyz Challenge #206 - Into The Woods:

Words To Craft By W2CB #58:

Mix It Up Challenge MIUCB #18 - Anything Goes + Monochrome:

Love,
Nandini

Thursday, October 18, 2018

Inktober at Mudra Craft Stamps...

Hi! I am on the Mudra Craft Stamps blog today with some cards with layered stamping. Also, check out a quick Diwali card using the newest layered dies from Mudra. These cards are part of the inspiration for the current challenge.


Here is a peek at the cards.


Please visit the Mudra Craft Stamps blog for more details on how I made my cards and also to link up your entries.

Love,
Nandini

Thursday, October 11, 2018

Altenew Academy Project #16...

Hi! Today's card for the Altenew Educator Certification Program Level Two is based on a very interesting class. Color Your Day taught by the ever amazing Therese Calvird talks about adding colour to your projects in innovative ways. She speaks a lot about colour theory, using the colour wheel and also drawing inspiration from different objects.

I have always been fascinated by the work of Andy Warhol, one of the most famous exponents of the Pop Art Movement. I chose this picture of Elvis Presley as my inspiration. 


I love the contrasting colours layered against each other. Here is my card.


I chose the Perennial Beauty stamp set because it has a more loose style. I used a mix of pigment inks and distress oxide inks for stamping. I used my heat gun to dry the inks between each layer and also added a layer of white pigment ink before stamping with colour. The sentiment is from the Fresh Freesia stamp set.

Here is a closer look at my pop art flower.


To finish, I trimmed the panel and popped it up with foam tape on a teal card base. I avoided any splatters or embellishments as I wanted the whole focus to be on the flower.

While I had my supplies out, I made one more card using only distress oxide inks.


I just layered the distress oxide inks, heat drying between layers. The effect is more subdued and honestly, I like both equally. Here is a closer look at the flower.


I used a kraft card base for this card and the sentiment is from the Painted Greetings stamp set.

I hope you liked my take on pop art. Looking forward to hearing from you.

Love,
Nandini

Saturday, October 6, 2018

Altenew Academy Project #15...

Hi! I am here today with my next project for the Altenew Educator Certification Program Level 2. This card is based on the Masking Unleashed class by Svitlana Shayevich. This is another amazing class which explains the masking technique in detail. There are lots of tips and tricks to make masking easier and better. There is detailed information on the supplies that can be used for masking which I found really useful. 

For my project, I used masking fluid for the first time. And I had a great time using it. Here is my card.


I took a paper of ivory cardstock and stamped the outline images from the Peony Bouquet stamp set randomly with Versafine Onyx Black ink. I covered the images with a layer of masking fluid and allowed it to dry. Once it was completely dry, I took my Jet Black Artist Marker and covered the entire background. I love the slight texture that I got. I removed the masking fluid with a regular eraser. I used my Artist Marker's to quickly colour the images. Here is a closer look at the panel.


Once my colouring was done, I die cut the panel with the Fishtail Banners die by Itsy Bitsy. I also cut a larger mat out of red cardstock. The sentiment is from the Birthday Greetings set by Altenew. To finish, I adhered the red banner on a golden yellow card base and mounted the coloured panel on top with some foam tape. I trimmed the sentiment strip and added a scalloped border underneath. 

I hope you liked my card. I look forward to hearing from you.

Entering my card in the following challenges.

CAS(E) This Sketch #292:


STAMPlorations October CAS Challenge:


Love,
Nandini

Wednesday, October 3, 2018

Addicted To Stamps And More #312...

Hi! The new challenge is up at the Addicted To Stamps And More blog. This week the theme is


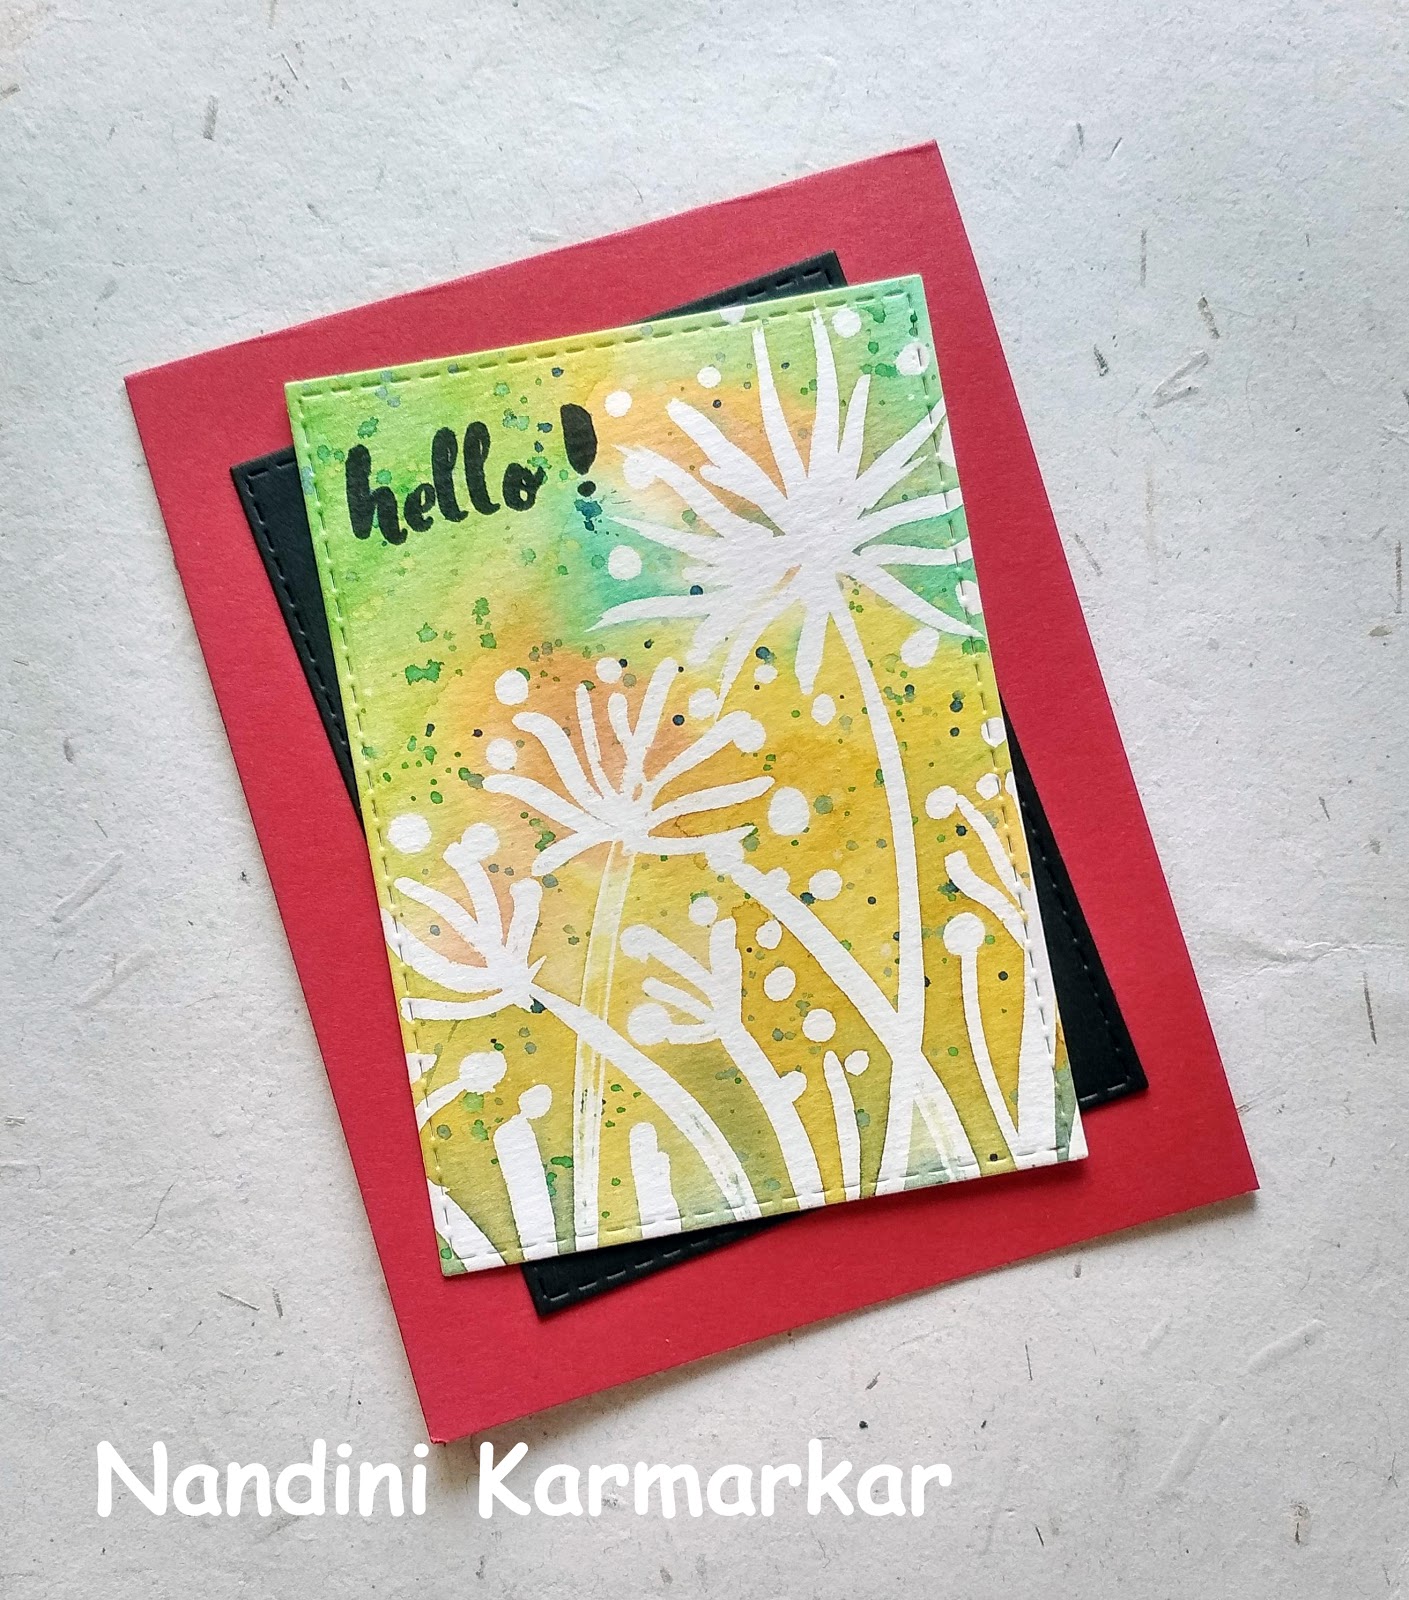
We want you to use pencils, pens, markers, watercolours, brushes, inks, anything to Make Your Mark. Here is the card I made.


I used some masking fluid to doodle on watercolour paper. Once it dried, I wet the paper thoroughly and dropped dye inks randomly. After the paper was dry, I added some splatters to continue the artsy look. I dried the panel completely with my heat gun and removed the masking fluid with a regular eraser.

The sentiment is from the Painted Greetings by Altenew. I stamped it with Onyx Black Versafine ink after trimming the panel. I also trimmed a piece of black paper with the same die.

To finish, I simply arranged the two panels on a red card base and adhered them down.

Here is a closer look at the card.


I hope you are inspired by my card to create something beautiful. Please visit the Addicted To Stamps And More blog for more inspiration and to link your creations.

Entering my card in the following challenges:

Simon Says Wednesday Challenge - Anything Goes:

Just Add Ink #428:


Cardz For Galz Challenge #81 - What's New?:
I used masking fluid for the first time.

Love,
Nandini

Wednesday, September 26, 2018

Altenew Academy Project #14...

Hi! I am here today with two cards that I created for the Altenew Educator Certification Program. These cards are my assignment for the Impressive Heat Embossing Techniques by Svetlana Marchenko.

I have always loved heat embossing and enjoy trying out new techniques. So I was really looking forward to this class. I would highly recommend this class to both newbies and experienced crafters. It covers the basics really well as well as giving several fresh ideas for using your supplies.

I chose to try a technique that I have admired for a long time but never tried. This was the lesson on Layered Heat Embossing. Here are the two cards I made.


I chose to use the Perennial Beauty stamp set because it is easy to line up and doesn't have an outline. I have a large collection of coloured Wow! embossing powders and I used them for my layering. I used glitter EP for the final layer. I don't have glitter blue EP. So I did the last layer with dark blue EP and then repeated the layer with Holographic EP.

Once my layered heat embossing was done, I thought the card needed something more. So I stamped the outline leaf image from the Peony Bouquet stamp set around the flower and heat embossed with clear EP. I didn't bother masking my flowers. I simply brushed off the clear EP off before heat embossing.

Here is a closeup of the blue flower.


There were lots of white specks on the card base after my embossing was done. To cover it I diluted some white poster paint, added a hint of blue and then flicked it all over my card. The sentiment is from the Birthday Greetings stamp set. I trimmed the sides and the bottom of the panel and mounted it on a bright blue card base with foam tape. Here is a closer look at the completed card.


Entering the card in the following challenges:

Simon Says Monday - Monochrome:

Allsorts Challenge Week 486 - Water or Colour Blue:

The Twisted Challenges TTC#4 - Celebrations + Monochrome:


Dare2B Artzy Septemper Challenge - Favourite Colour:
I really love the colour blue, especially when combined with black.


I wasn't too sure about the pink flower. In fact, I started stamping two pink flowers - one on black and the other on dark blue base. The dark blue one was abandoned after a couple of layers because it wasn't looking good. The paper was wrapping too much and the colours didn't work together. When the final layer was done, I loved it! Here is a close up of the pink flower.


I trimmed the flower panel and adhered it to a black card base. I die cut the second panel with an aperture out of the same cardstock and mounted it over the flower with foam tape. Before that, I stamped the sentiment from Birthday Greetings stamp set with glitter pink EP. I tried to re-stamp the sentiment with my stamp positioner. Unfortunately, the paper shifted slightly. So I heat embossed with clear EP. This gave a nice, off-set shadow to the sentiment. Here is a close look at the completed card.


Entering the card in the following challenges:

Simon Says Stamp Wednesday Challenge - Bling It On:

The Flower Challenge - #24 - Anything Goes:


Some of the lessons I learnt are:
  • Use the anti-static powder LIBERALLY between layers. Otherwise, you will end up with a speckled mess. I use talcum powder with a makeup brush.
  • Make sure your heat gun is very hot and you work very fast especially towards the end. If you apply too much heat, the layers will start melting together.
  • Use a juicy ink pad for stamping and stamp couple of times to get a good coverage.
  • Test the paper you are using beforehand. You don't want to abandon the card after putting in a few layers because the paper starts warping or the colours don't work well together..
  • Use an opaque embossing powder for the base layer. Otherwise, it will not show up on the dark card base.
  • Feel free to mix small amounts of embossing powders to create new colours or effects. 
Love,
Nandini

Tuesday, September 25, 2018

Altenew Academy Project #13...

Hi! As promised I am back with my next project for the Altenew Educator Certification Program. My card is based on the Beyond Basic Backgrounds class by Lydia Evans. This class is really great as it teaches several techniques for creating beautiful backgrounds. I especially loved the Matt Watercolor Resist technique. Here is my card using this technique.


As I didn't have any freezer paper, I decided to do some experimentation or 'jugad' as we say in Mumbai. I die cut several pieces of regular card stock with the Dodecagram set. I applied Aleene's Tack-It Over & Over glue to the reverse with a blending sponge and allowed the pieces to dry. Once dry, I temporarily adhered the die cuts to a large sheet of watercolour paper. I sprayed the paper generously with water and then started dropping Camlin Photo Inks randomly. I went for a sort of rainbow effect. I allowed the sheet to air dry completely before removing the die cuts.

I cut part of the sheet to size for my background panel. For the gold mat, I simply covered two sides of a black paper with Versamark ink and heat embossed with gold EP. I tied a narrow black satin ribbon towards the bottom and mounted the sentiment panel over it with some foam tape. The sentiment is from the Birthday Greetings stamp set and I heat embossed it with Sparkle Gold EP. I mounted the whole panel on a black card base with foam tape.

I really love this bold background. Since I made an entire sheet, I have enough left to make 3-4 more cards. My only problem was that I didn't test the 'masks' I created on the watercolour paper. They did stick quite a lot. But I was able to remove them with a little patience. Since the watercolour paper was already quite textured, the damage didn't show much.

Here is a closer look at the card.


I had a lot of fun and learnt some wonderful new techniques in this class. I am looking forward to putting more of them to practice.

I am entering this card in the STAMPtember celebration by Simon Says Stamp.

Also entering the card in the following challenges:

Freshly Made Sketches #355:
I rotated the sketch for my card.

Back To The Basics and Beyond Challenge #12 - Inky Backgrounds:

Try It On Tuesdays - Slap It On:

Love,
Nandini